Page 1
Rotating Slightly - Introduction
It's one thing to rotate a photo 90 degrees, that's simple. What about a photo that is just slightly crooked? Paint.NET can fix that too.
Page 2
Opening a Photo
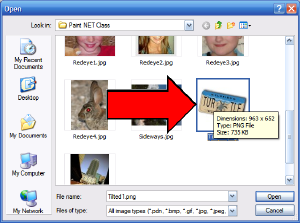
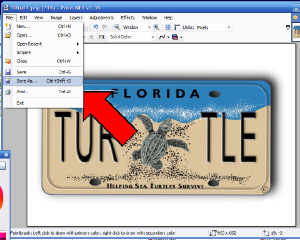
Click on "File", and select, "Open". Locate the "Tilted1.jpg" picture, and select it. You can also go to your "Pictures" folder, locate the "Tilted1.jpg" file, and right click on it, and select "Send To", and then select "Paint.NET".
Click on the image for page view.
Page 3
Open Titled1.jpg
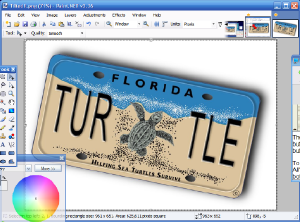
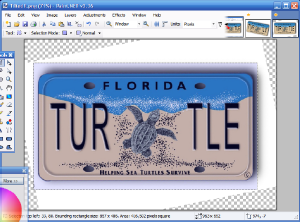
Open the Tilted1.jpg file, with the picture of a Turtle license plate. As a practice exercise, we will straighten out the plate so it is level in the picture.
Click on the image for page view.
Page 4
Rotate/Zoom Method - Start
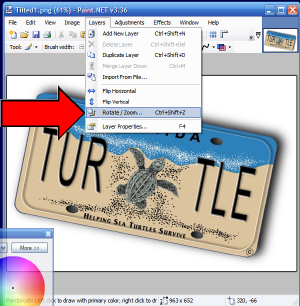
The first method we will use to straighten the picture is the "Rotate/Zoom" method. To use this, simply click on "Layers" in the Menu Bar, and select "Rotate/Zoom".
Click on the image for page view.
Page 5
Rotate/Zoom Method - Select "Angle"
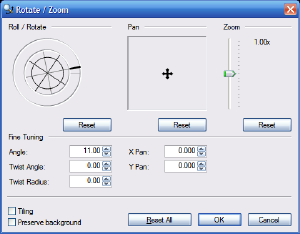
When you click on "Layers", and "Rotate/Zoom'", the dialog box shown below appears. You can move this dialog box around by holding your left mouse button down on the blue header bar, and moving your mouse. We will rotate the picture by clicking the "up" or "down" button on the "Angle" box. Or you can type an angle in directly.
Click on the image for page view.
Page 6
Rotate/Zoom Method - Set Angle to 11 Degrees
Click the up-arrow 11 times until it comes to 11 degrees. If you do this slowly, you will see the picture rotate slightly (1 degree) with each click. 11 degrees is what it takes to make this photo approximately level. Your photo may require a slightly different amount.
Click the "OK" button after you have set the angle to 11 degrees. This will cause the picture to be set at the correct angle.
Click on the image for page view.
Page 7
Rotate/Zoom Method - Fixing the Corners
One of the issues always faced when rotating a photo, is that the corners will appear blank where the photo is rotated. This makes sense, because the photo didn't have any information in the corners, so where would it come from :).
There are two ways to fix this. In this picture, the background is white, so it is easy to just paint the corners white, and that fixes it. To paint the corners white, just click on the "Paintbrush" icon on the Toolbar. Then click on "Brush Width" to change it from "2" to something like "30". Then put the mouse cursor in the corner, hold the right-mouse button down, and "paint" in the missing white corners. If you get black, then either click the "switch" arrow on the colors Toolbar, or hold down the "right" mouse button, instead of the left mouse button.
If the corners weren't white, then the other way to fix it would be to crop the photo to a smaller size, to hide the fact that the corners are blank. This is covered in Tutorial number 8-Crop a Photo.
Click on the image for page view.
Page 8
Rotate/Zoom Method - Save Your Work
After you finish fixing the corners, click on "File" and "Save As", and give it a new file name. It is wise to never overwrite your original, but to always save as a new name. You might save this as "Tilted1-straight.jpg", to indicate that it was fixed.
For another method of fixing a slightly tilted picture, see the next page.
Click on the image for page view.
Page 9
Right-Mouse Button Method - Select All
The next method to rotate a photo slightly is to "Select All", and then hold the right-mouse button down, and while holding it down, move your mouse. It takes a little experimenting, but you can rotate the picture any way you want.
To start, let's open the Turtle picture again. If you recall, the keyboard shortcut for "Select All" is "CTRL+A", so hold the CTRL key down, and press the "A" key firmly. Then let them both go. This has "selected" all of the photo.
Click on the image for page view.
Page 10
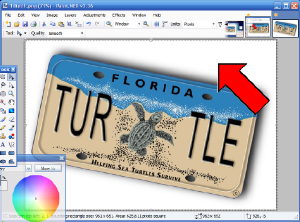
Right-Mouse Button Method - Position Cursor
Now put your mouse cursor in about where the red arrow points below, about half way between the center of the picture and the edge. Now hold down the right mouse button.
Click on the image for page view.
Page 11
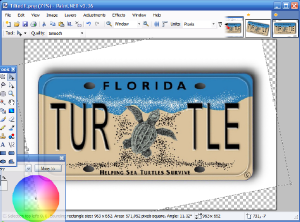
Right-Mouse Button Method - Voila! - Straightened Picture
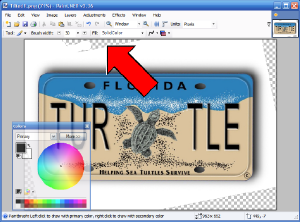
As you move the mouse (with the right mouse button depressed), you will see the picture rotate. You will have to judge when the photo is "straight", but there you go. When it looks straight, just let the mouse button loose. You can depress it, and adjust it again, if ou need to.
Note we have the problem with the "Corners" again. This time, we will fix it by "Cropping" the photo. First, locate the "Tools" bar.
Click on the image for page view.
Page 12
Fix Corners - Rectangle Select Method
Find the "Tools" bar, and click on the dotted rectangle in the upper left corner. This will let you "select" a rectangle on the photo.
Click on the image for page view.
Page 13
Fix Corners - Select Rectangle
Look at the photo below, you can see a dotted line rectangle around the license plate, within the "white" section. I did this by positioning the mouse in the upper right corner, then holding the left mouse button down, and then "dragging" the outline until it is adjusted they way I wanted. If you let go the outline, and you wantto position it differently, you must click on the "Rectangle Select" button on the "Tools" bar again first. You must remember this.
Click on the image for page view.
Page 14
Fix Corners - Copy Rectangle
The next step is to "copy" the rectangle. To do this, use the keyboard shortcut for "copy", which is "CTRL+C". So hold the "CTRL" key down, and while holding it down, press the "C" key down firmly, and then let them both up. This copies the contents of the dotted rectangle to the Clipboard. Now the next steps must be followed exactly.
Page 15
Fix Corners - File New
The next step is to click "File" in the upper left corner of the Menu Bar, and select "New".
Click on the image for page view.
Page 16
Fix Corners - Just Click OK
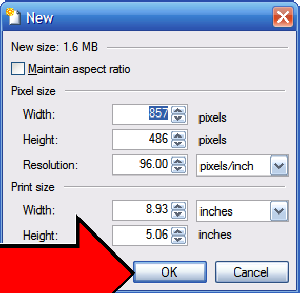
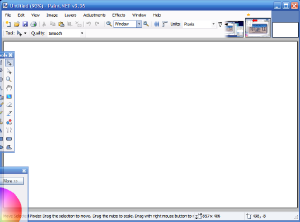
When the "New" dialog box comes up, it is VERY IMPORTANT that you touch nothing and change nothing on this screen. Just click the "OK" button. This will lead you to a plain white screen, as seen on the next page.
Click on the image for page view.
Page 17
Fix Corners - Now Paste the Clipboard
Now "Paste" the clipboard. If you remember your keyboard shortcuts, "Paste" is "CTRL+V". So hold the "CTRL" key down, and while holding it down, press the "V" key firmly, and then let them both go.Fix Corners - Now Paste the Clipboard
Click on the image for page view.
Page 18
Fix Corners - Voila! FIXED
The "Fixed" photo appears instantly. Now be sure to "Save" it by clicking on "File" and then "Save As", and give it a name, such as "Tilted1_straight_1.jpg", that is unique.
That is it, you now have two ways to fix the corners.
Click on the image for page view.
Page 19
Open Tilted2.jpg
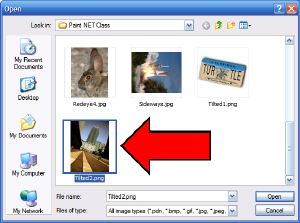
Now try this yourself. Click on "File" and "Open", and open "Tilted2.jpg". Then see if you can straighten up this picure. You may wish to use the "crop" method to fix the corners.
Click on the image for page view.
Page 20
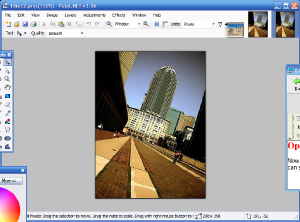
Tilted2.jpg - The Tilted Tower
See if you can straighten up the tower in this picture. Have fun and enjoy. Please feel free to ask me any questions. This completes the tutorial on straightening slightly tilted pictures.
Click on the image for page view.
|