Page 1
PIXresizer Introduction
PIXresizer is a photo resizing program to easily create web and e-mail friendly versions of your images with reduced file sizes. You would use this program to reduce pictures taken by a high resolution digital camera, which are often 2 MB to 5 MB is size or larger, to a size suitable for emailing. Email programs usually have a 1 MB or 2 MB limit on attached pictures, and smaller is even better. PIXresizer can easily do this for you.
The reduced files are saved in a different folder, so your original images are not altered at all. PIXresizer offers several different resizing methods to choose from and can automatically recognize image sizes to calculate the best fit.
Click on the image for page view.
Page 2
PIXresizer Installation
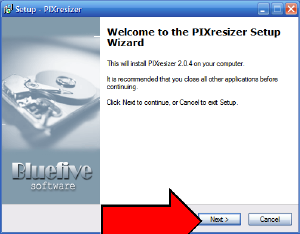
Double click on the PIXresizer installation program. This will bring up the "Welcome" screen. Click on "Next".
Click on the image for page view.
Page 3
PIXresizer Installation (Continued)
On the "License Agreement" screen, click on "I accept the agreement", and then click the "Next" button.
Click on the image for page view.
Page 4
PIXresizer Installation (Continued)
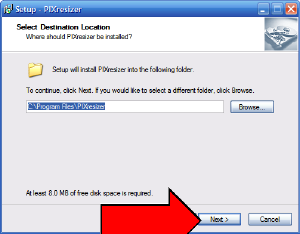
On the "Location" screen, click the "Next" button
Click on the image for page view.
Page 5
PIXresizer Installation (Continued)
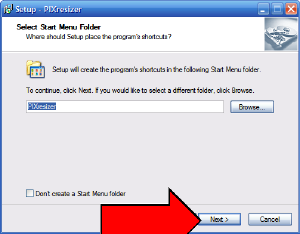
On the "Select Start Menu Folder" screen, just click the "Next" button.
Click on the image for page view.
Page 6
PIXresizer Installation (Continued)
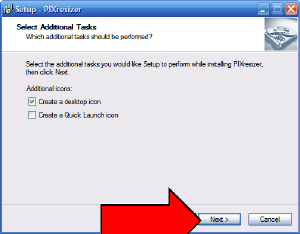
On the "Select Additional Tasks" screen, just click the "Next" button.
Click on the image for page view.
Page 7
PIXresizer Installation (Continued)
On the "Ready to Install" screen, click the "Install" button.
Click on the image for page view.
Page 8
PIXresizer Installation (Continued)
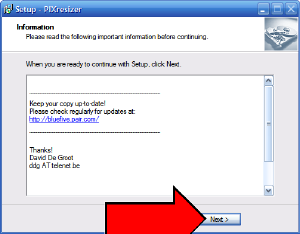
On the "Information" screen, click the "Next" button
Click on the image for page view.
Page 9
PIXresizer Installation (Finished)
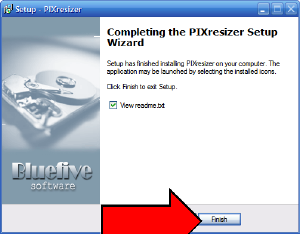
On the "Completing" screen, click the "Finish" button. This completes the installation of the free PIXresizer program. See the next pages for how to use PIXresizer. Note that if you use RocketDock, you may want to add this icon.
Click on the image for page view.
Page 10
PIXresizer - How to Use
On the "Completing" screen, click the "Finish" button. This completes the installation of the free PIXresizer. To use PIXresizer, first double click on the icon, and open the program. The first step is to load a picture. So click on the "Load Picture" button.
Click on the image for page view.
Page 11
PIXresizer - How to Use (Continued)
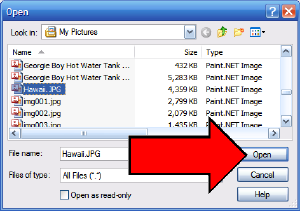
On the "Open" screen, you must browse to and locate the picture you want to resize. In my example, I am in the "My Pictures" folder, and am selecting a picture named "Hawaii.jpg". Notice that it is a fairly large size picture, 4,359 KB, which means 4.359 MB. Most email programs have a limit of 2 MB, and realistically, it is best to resize pictures to somewhere between 100 KB and 900 KB.
Click on the image for page view.
Page 12
PIXresizer - How to Use (Continued)
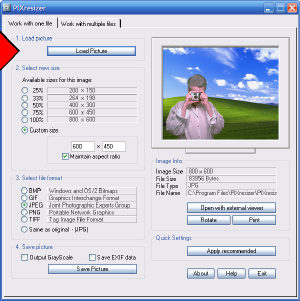
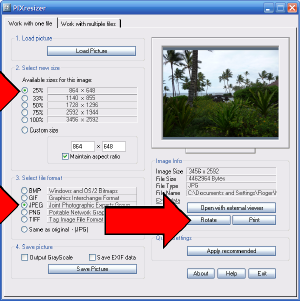
Notice that PIXresizer now displays my picture. A good goal for a picture to be emailed is to aim for a size somewhere around 600 x 800 for landscape oriented pictures, or 800 x 600 for portrait oriented pictures, either way. I can see on the available sizes for this picture, that selecting 25% will put me at 864 x 648 which is nicely close to my 800 x 600 goal. The 33% selection at 1140 x 1296 would probably be ok to, but I prefer to aim for the closest to 800 x 600.
I also would select "JPEG" as the file format, if it is not automatically selected. That is a good file format for sending pictures through emails.
Note also that on this screen, you can rotate pictures, if they happen to be sideways :)
With all these selections properly made, just click the "Save Picture" button.
Click on the image for page view.
Page 13
PIXresizer - How to Use (Continued)
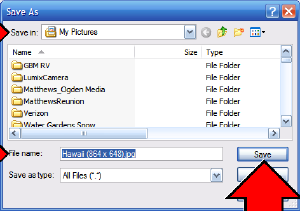
On the "Save As" screen, notice it wants to save to "My Pictures", the same folder myh original picture is in. This is usually a good choice, and works for me here, so I will leave that as is.
The filename is proposed as "Hawaii (654 x 648).jpg", which is the original name with thte new size as part of the name. That is an excellent name choice. You do NOT want to use the original name, as that might overwrite and destroy your original picture. You don't ever want to lose your original picture.
So with those options accepted, just click the "Save" button.
Click on the image for page view.
Page 14
PIXresizer - How to Use (Continued)
Click "OK" on the "Yeah!" screen. Now you can close PIXresizer. Go to "My Computer", and locate your picture.
Click on the image for page view.
Page 15
PIXresizer - How to Use (Finished)
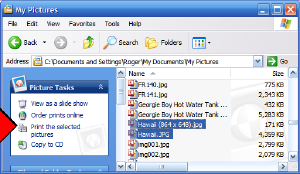
Notice that The original picture at 4.3 MB is still there, but I have a new version that is only 171 KB in size. That is an excellent size for emailing. For normal purposes, the smaller size is fine. The original would be better for printing out on paper, such as printing a photo.
PIXresizer can also resize all the pictures in a folder. Click on the tab, "Work with multiple files". I will leave that out of this tutorial, but it is quite simple to do, if you wish.
This completes the tutorial on free PIXresizer program. This is a useful tool if you often email pictures to friends. Enjoy.
Click on the image for page view.
|