Page 1
RocketDock Introduction
RocketDock is an attractive, smoothly animated application launcher, modeled after the application launcher on Apple Macs. It provides a nice clean interface to drop shortcuts on for easy access and organization. Nearly everyone who has tried it likes it.
Click on the image for page view.
Page 2
RocketDock Download
You can download RocketDock from WaterGardens55.org, or you can go to Google, and search for "RocketDock filehippo", click "Download Latest Version", and download from there. When you have the RocketDock install program downloaded to your PC, you are ready to install. Double-click on the Install program to begin installation.
Page 3
RocketDock Installation
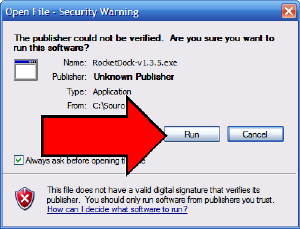
On this first installation dialog box, click the "Run" button, as shown.
Click on the image for page view.
Page 4
RocketDock Installation (Continued)
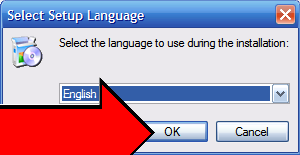
Accept "English" as the language, and click "OK".
Click on the image for page view.
Page 5
RocketDock Installation (Coninued)
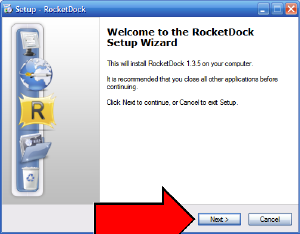
On the "Welcome" screen, click "Next"
Click on the image for page view.
Page 6
RocketDock Installation (Continued)
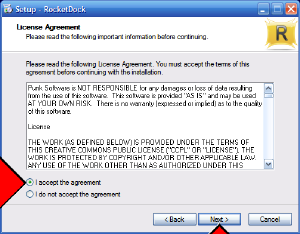
On the License Agreement page, click "I accept the agreement", and then click the "Next" button.
Click on the image for page view.
Page 7
RocketDock Installation (Continued)
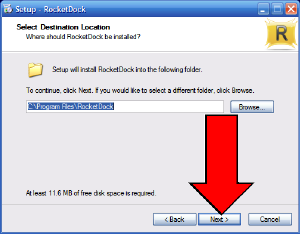
Accept the suggested destination, and click the "Next" button.
Click on the image for page view.
Page 8
Rocket Dock Installation (Continued)
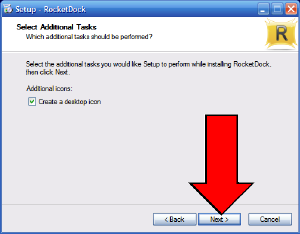
On the "Select Additional Tasks" screen, accept the default, and click the "Next" button.
Click on the image for page view.
Page 9
RocketDock Installation (Continued)
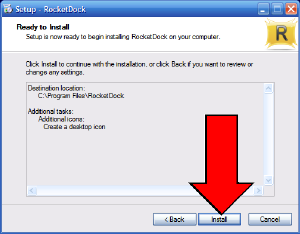
On the "Ready to Install" screen, click the "Install" button.
Click on the image for page view.
Page 10
RocketDock Installation (Continued)
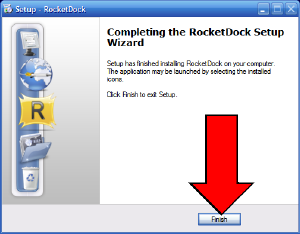
On the "Completing the RocketDock Setup Wizard", click the "Finish" button. This completes the installation of RocketDock.
Click on the image for page view.
Page 11
RocketDock Configuration - General Tab
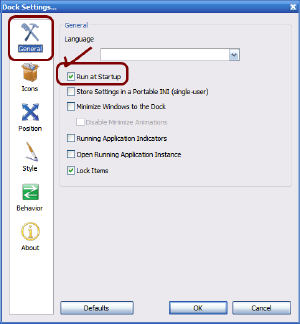
The first step in configuring RocketDock is to click on the "Dock Settings" icon, which is the "Yellow Wrench/Hammer" icon. This is a most important icon, and one which must not be deleted. When you click on it, the "Dock Settings" dialog box appears, as shown below. Note that we are on the General tab. The tabs are listed down the left side of the page. Be sure to put a checkmark in "Run at Startup", which will cause RocketDock to automatically start when you login to your computer. Don't check "Lock Items" yet, that is the last step :)
Click on the image for page view.
Page 12
RocketDock Configuration - Icons Tab
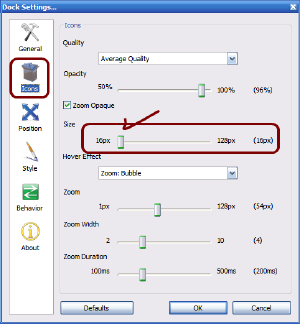
Click the Icons tab on the left side. Here you control the appearance of the icons in the RocketDock launch bar. Particularly, when you are done with the setup of RocketDock, you will want to slide the "Size" slider bar to the left side (16px) or close to it. This will size the launch bar fairly small, but notice the icons get larger when you hover over them.
Click on the image for page view.
Page 13
RocketDock Configuration - Behavior Tab
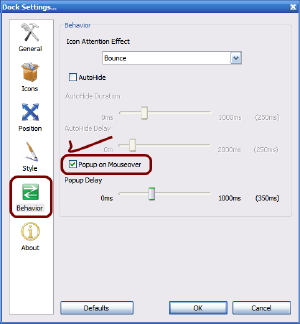
On the Behavior tab, click the "Popup on Mouseover" box. That is all you will normally ever do on the Behavior tab.
Click on the image for page view.
Page 14
RocketDock Configuration - Position Tab
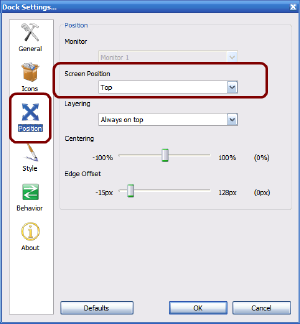
On the Position tab, you can change the location of RocketDock from the top to either side or the bottom. I like it at the top, but you can experiment and find what you like.
Click on the image for page view.
Page 15
RocketDock Configuration - Style Tab
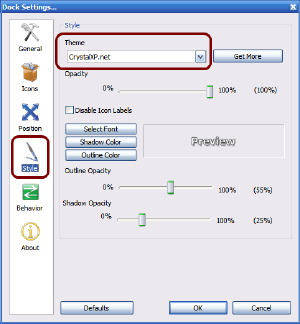
On the Style tab, you can play with other than the default theme. I happen to like the default theme, but it is nice to know it is there. You can also experiment with the fonts and opacities. These control the labels that display under the icons in RocketDock when you hover over them.
Click on the image for page view.
Page 16
Adding and Removing Icons
Now that RocketDock is setup, you are ready to add your own icons. You will want to put icons for all the programs you normally use up there. To add or remove icons, or to change their order, you will need to "Unlock" the RocketDock launch bar. To do this, right-click on any icon, and select "Lock Items". When there is a checkmark in front of "Lock Items", the bar is locked. When there is no checkmark, then bar is unlocked.
When the bar is unlocked, just drag and drop any icons onto the launch bar, as you choose. Left-click on the icon, and hold the left-click down as you move the icon onto the launch bar. When you are on the launch bar, let up on the left-click button. The icon should appear on RocketDock. Repeat this with the icons for each program that you use, until all your icons are on RocketDock.
To remove icons from RocketDock, just drag them off the bar. They will "poof" and disappear. This only works when RocketDock is "unlocked" :)
When you have RocketDock looking the way you want, right-click on any icon, and select "Lock Items". This will lock RocketDock, so that you don't accidentally delete icons from RocketDock.
This concludes the RocketDock tutorial.
|